A custom traffic cone order is really a short sequence of decisions, and taking them in the right order keeps you from paying for a cone that is not legal for the job. Height, base weight, reflective collars, color, material, and branding each depend on the ones before them. Here is how to build the spec from the road up, so the finished cone is both compliant where it needs to be and unmistakably yours.
Step 1: Let the road set the height
Cone height is not a style choice on a public road; it is tied to speed and visibility under the federal MUTCD guidance. For daytime work on low-speed roads, roughly 40 mph or under, an 18-inch cone is the accepted minimum. Once you are working at night, on higher-speed roads above about 45 mph, or on freeways, the minimum jumps to a 28-inch cone, and 36-inch cones are common where maximum visibility matters, such as large work zones or fast, high-wind corridors. If your cones are purely for a parking lot, an event, or indoor wayfinding, you have more freedom, but the moment they touch a public roadway the height requirement is the first thing an inspector will check. Decide the tallest environment the cones will ever work in and size for that.
Step 2: Match the base weight to the conditions
Height and ballast are specified together. A tall cone on a light base tips in wind or in the air wash of passing trucks, which is exactly where it is least safe to have a cone rolling into a lane. As a rough guide, an 18-inch cone commonly ships on a base of around 3 pounds, a 28-inch cone in the 7 to 10-pound range, and a 36-inch cone at 10 pounds or more, with heavier options for windy or high-traffic sites. Sandbag rings and specially weighted bases push stability further when you need it.
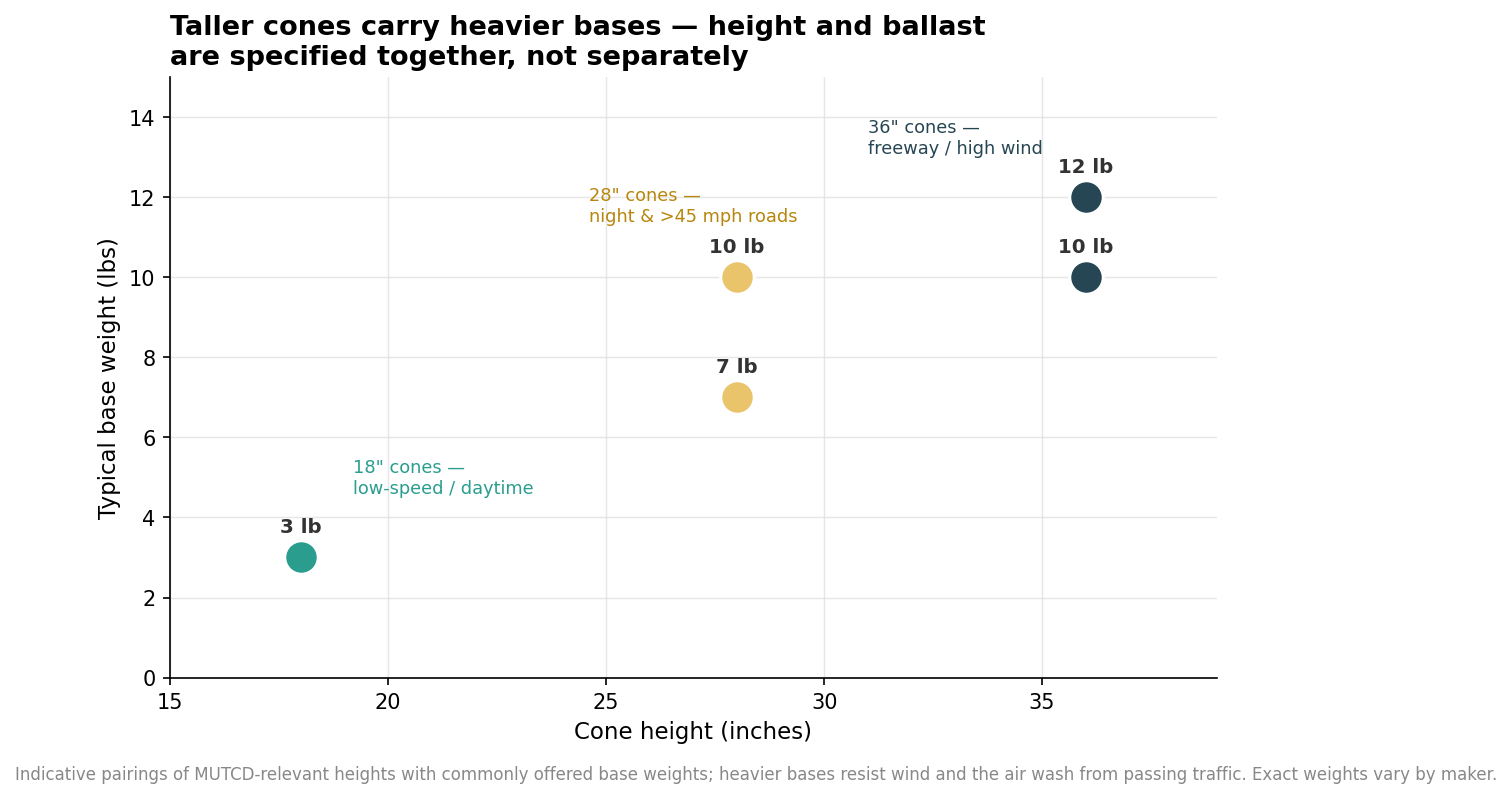
The pattern is simple: as the cone gets taller, the base gets heavier, and you choose the weight for the worst wind and traffic the cone will face, not the average day.
Step 3: Specify the reflective collars for night and highway use
Reflectivity is where compliance is won or lost. For cones 28 inches and taller used at night or on high-speed roads, the MUTCD calls for two white retroreflective bands: a 6-inch band placed 3 to 4 inches from the top, and a 4-inch band roughly 2 inches below it. That specific two-collar layout is what makes a cone show up in headlights at distance, and it is not optional for regulatory roadway use. For non-regulatory uses, a parking lot, a film set, an event, you can run a single collar or none at all, which also frees up more of the cone body for branding. Decide early whether each cone is a regulatory road cone or a private-use cone, because that single answer drives both the collar layout and how much room you have to print.
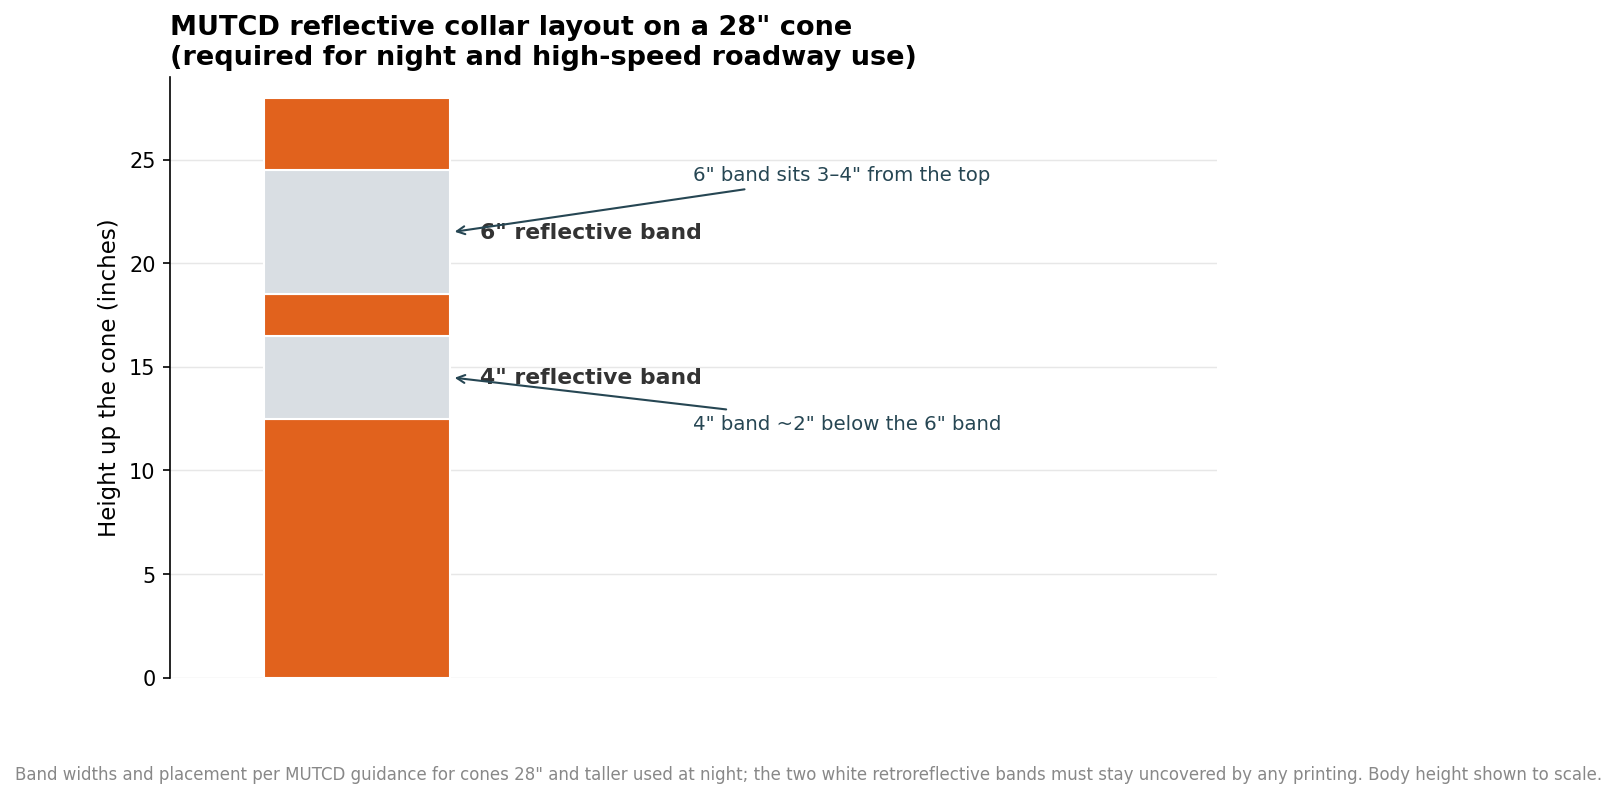
The dimensioned layout above is worth handing to your supplier directly, because getting the band widths or placement wrong is a quiet way to end up with cones that look right but fail an inspection.
Step 4: Choose color and material deliberately
For roadway use, the cone must be predominantly fluorescent orange; that is the color drivers are conditioned to read as a hazard, and alternates do not substitute for it in a regulatory setting. Off-road, color becomes a useful tool: pink, green, blue, yellow, and other colors are widely used to code lanes, teams, zones, or departments in warehouses, lots, and events, where no roadway standard applies. Material is the next line on the spec. Injection-molded PVC is the heavy-duty, commercial-grade choice with good resilience, while polyethylene is lighter and flexes without cracking, which some buyers prefer for cold climates. Underneath, a heavy rubber base, often EPDM or nitrile and frequently made from recycled rubber, supplies the impact resistance and the weight that keeps the cone planted. If the cones will live outdoors, confirm the orange is UV-stabilized so it does not chalk and fade within a season. Temperature matters too: rigid formulations can grow brittle and crack in hard freezes, while a more flexible blend shrugs off being run over and springs back, so tell your supplier the climate the cones will work in rather than leaving the material choice to a default.
Step 5: Add your branding without breaking the cone
Branding is the last step precisely because it has to work around everything above it. Cones are typically decorated after assembly using screen printing, pad printing, heat transfer, or applied vinyl, and a logo or safety message can go on the body, on the collar area of non-regulatory cones, or on a printed sleeve. The one hard rule for road cones is that printing must not cover the retroreflective bands; those collars are safety equipment, and obscuring them defeats the purpose and the compliance. In practice that means placing your logo on the orange body below the lower band, or between bands only if space genuinely allows, and reserving full-body creative treatments for private-use cones that carry no regulatory collars. Once those placements are set, the remaining order details, quantity, lead time, and minimums, are straightforward, and they tend to reward batching a single design across a larger run rather than spreading small orders across many variants. Build the spec in this order, height, base weight, collars, color and material, then branding, and the cone that arrives is both legal for its road and clearly your brand.